Our goal is to let you know how to update virtual RAM in your Windows Based Machine. Virtual RAM is actually Virtual Memory and when RAM( random access memory ) fully loaded, it share some space from Hard Drive.
How to update virtual RAM ?
Well, There is a small video tutorial about how to update Virtual RAM right below, you may have a look on it or you may have a look on text based tutorial below the video tutorial.
text based tutorial
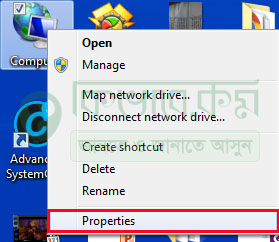
To update virtual RAM in your windows operating system, right click upon your computer icon (This PC in case of Windows 10 or 8). After right click, go to Properties option. See the below image.
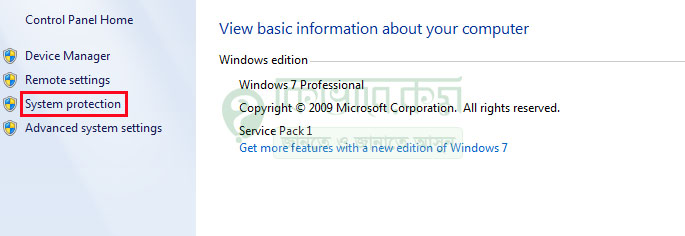
Now after clicking on Properties, you will have the following window. Now from the left side, you will have a option called “System protection ” as red mark in the below image, click there.
After choosing System protection, you will have following Dialog box. And from that, choose “Advance”.
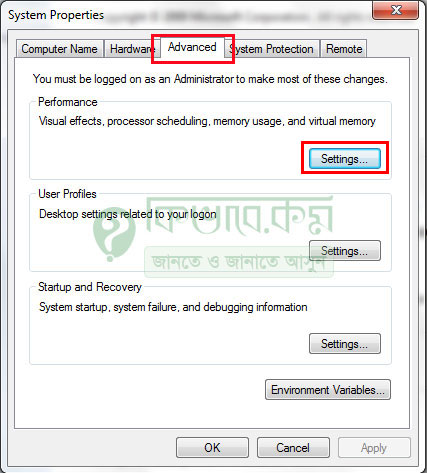
Now from Advance Tab, choose Settings from the performance section as marked in above. And then you will get another window as below. Now from this Performance Options dialog box, again choose “Advance”. After that, choose “Change…” but as marked.
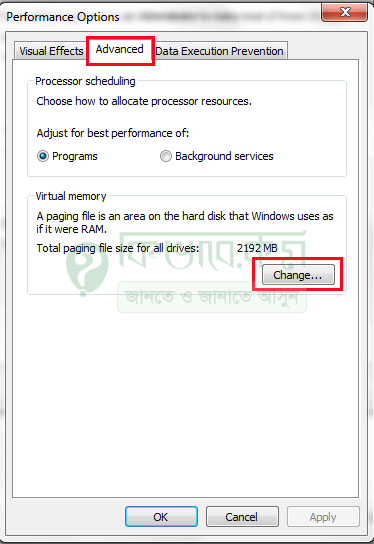
After choosing “Change…” we will get another dialog box and now we are into the final step. Now we are in Virtual Memory Dialog box.
This time, uncheck “Automatically manage paging file size for all drives” and then choose “Custom size”
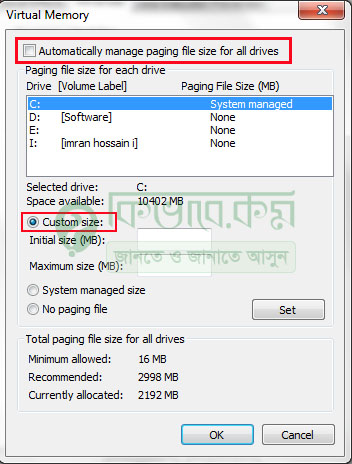
Now we will set the initial and maximum size for Virtual RAM and make sure you have free space in your C drive more then the Maximum Size you are going to set. Or if you want set another drive for Virtual RAM, you may choose.
In case of me, will set 4GB as initial size and 8GB as Maximum size. So, in Initial Size (MB) box, I will put 4 * 1024 = 4096 and on Maximum size, double of the initial size, i.e 4096*2 = 8192
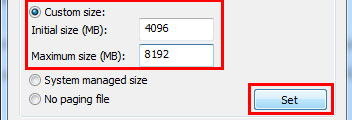
After setting Custom size, click to Set button and then finish with OK previously opened tab are still open. Now restart your machine and enjoy.
