এইচটিএমএল ট্যাগ – html tag ও html attributes
আমাদের আজকের আলোচনার বিষয় এইচটিএমএল ট্যাগ ( html tag ) ও এট্রিবিউট নিয়ে। এর আগের আর্টিকেল এ আমরা জেনেছিলাম কিভাবে এইচটিএমএল দিয়ে Hello World লিখা যায় ।
html tags and attributes
এইচটিএমএল ট্যাগ (HTML tag)
এর আগে আমরা যে Hello World লিখা শিখেছিলাম, সেখানে আমরা কয়েকটা ট্যাগ এর নাম জেনেছি যেগুলো ছিল html, head, title body এবং h1. যেখানে বলেছিলাম যে বেশির ভাগ ট্যাগ গুলোর Closing tag থাকে, যেমন <html>…</html>- এখানে <html> হল Opening Tag আর </html> হল Closing Tag. একই রকম ভাবে <head>…</head>, <body>…</body>,<h1>…</h1>
Closing tag আছে এই রকম আরো বেশ কিছু ট্যাগ হল: article, aside, section, nav, ul, ol, li, form, button, table, th, td, tr, header, footer, h1 to h6, span, strong ইত্যাদি । ধিরে ধিরে আমরা এই সব ট্যাগ এর ব্যবহার শিখে যাবো ।
আবার কিছু কিছু ট্যাগ আছে যেগুলোর ক্লোজিং ট্যাগ নেই । যেগুলোর Closing tag নেই সেগুলো শুধু শুরু হয় এবং নিজে নিজে ই ক্লোজ হয় যেমন <br>, <img>
Closing Tag নেই এই রকম কিছু ট্যাগ হল : a, strong, span, sup, sub, input, textarea, label ইত্যাদি । আগামিতে এই ট্যাগ গুলোর কাজ জানবো …
এইচটিএমএল এট্রিবিউট ( HTML attribute )
html tag এর ভিতরে থাকে attribute. Attribute আসলে একটি ট্যাগ এর সাথে আরো কিছু তথ্য যোগ করে । ভালোভাবে বোঝার জন্য আসলে কোড দেখা দরকার । চলুন তাহলে কিছু কোড দেখি ।
<!DOCTYPE html>
<html>
  <head>
    <title>Show Image in HTML </title>
  </head>
  <body>
    <h1>A new Image</h1>
    <img src="myimage.jpg" alt="My image">
  </body>
</html>
উপরের কোড ব্লক এ নতুন একটি ট্যাগ আছে যেটি হচ্ছে img ট্যাগ
<img src="myimage.jpg" alt="My image">
এখানে <img> হল একটি html tag যার সাথে যোগ হয়েছে src=”myimage.jpg” alt=”My image” .
তো src হল একটি attribute যার ভেলু হচ্ছে “myimage.jpg” যেটি একটি ইমেজ ফাইলের নাম । src attribute টি source বুঝাতে ব্যবহার করা হয় ।
একই ভাবে alt আর একটি attribute যা যদি কোন কারনে ইমেজ টি লোড না হয় তখন কিছু লেখা শো করে । উপরের কোডে alt = “My image”, তাহয়ে My image হল alt attribute এর ভেলু ।
এই রকম HTML Tag ভেদে বিভিন্ন ট্যাগ এর জন্য আলাদা আলাদা Attribute আছে যেমন :
<a href="https://kivabe.com"> kivabe.com </a>
এখানে a tag এর attribute আকারে href আছে যার ভেলু https://kivabe.com এবং এটি হলো a tag টিতে ক্লিক করলে কোন ঠিকানায় যাবে তা বলে দিয়েছে ।
Global HTML Attribute
কিছু html attribute আছে যা যেকোন ট্যাগ এর সাথেই যায় । এ ট্যাগগুলোকে Global Attribute বলে । নিচে সেগুলো তুলে ধরছি :
class, id, title, style ও data-
Class and ID Attribute
class ও id সিলেক্টর ( selector ) হিসেবে ব্যবহার অধিকাংশ সময় । বিশেষ করে CSS ও JavaScript selector হিসেবে বেশি ব্যবহার হয় ।
<a id="main-site" class="link" href="https://kivabe.com"> kivabe.com </a>
Id-র যে ভেলু থাকে তা সবসময় ইউনিক হবে । যেমন উপরের উদাহরনে id=”main-site” দিয়েছি যেখানে main-site হল id টির ভেলু । এবং এই ভেলুটি একই HTML Page এর অন্য কোন ID-র ভেলু হিসেবে ব্যবহার করা যাবেনা । তবে অন্য পেজে আপনি ব্যবহার করতে পারেন ।
class এর ভেলু আপনি একধিক বার ব্যবহার করা যেতে পারে ।
title attribute
title attribute টি ব্যবহার হয় এইচটিএমএল ট্যাগ গুলোর title show করার জন্য । title নামে একটি html tag ও আছে যা আমরা উপরের অংশে দেখেছি । তবে সেটির কাজ ছিল পুরো এইচটিএমএল পেজ এর টাইটেল দেখানো, কিন্তু title attribute এর কাজ হচ্ছে এটি যে html tag এর সাথে থাকবে তার টাইটেল দেখানো ।
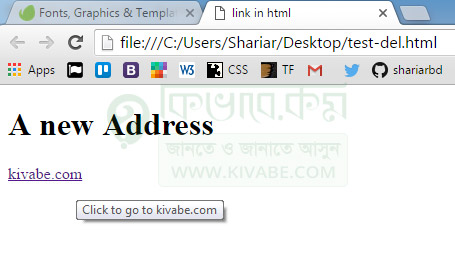
<a title="Click to go to kivabe.com" href="https://kivabe.com"> kivabe.com </a>
anchor tag (a tag) টির উপরে মাউচ নিয়ে গেলে একটু পরে দেখাবে click to go to kivabe.com
title attribute
style and data- attribute
style attribute ব্যবহার করা হয় inline css লিখার জন্য, যেমন নিচের কোড টিতে দেখুন
<a style="color:green;" href="https://kivabe.com"> kivabe.com </a>
উপরের style attribute এর value আকারে css code লিখা আছে যেটি a tag এর কালার পরিবর্তন করবে । আমরা এর সম্পর্কে আরো বিস্তারিত জানবো যখন css শুরু করবো
তো এখন এ পর্যন্তই, আপনার কোড এডিটর ওপেন করে প্রেকটিস শুরু করে দিন  সামনে আরো কিছু আসছে আপনাদের জন্য


ভাইয়া, HTML এর আর টিটোরিয়াল কবে পাবো?
একটু অপেক্ষা করুন, আমরা কদিন বাদেই আবার html এর টিউটোরিয়াল দেয়া শুরু করবো …