পোর্টেবল হার্ডডিস্ক বানাবো কিভাবে
ধরুণ, আপনার একটি নষ্ট ল্যাপটপ রয়েছে আর একটি ভালো ল্যাপটপ । এখন নষ্ট ল্যাপটপ এর হার্ডডিস্ক অন্য একটি ল্যাপটপে ব্যবহার করবেন, অর্থাৎ পোর্টেবল হার্ডডিস্ক তৈরি করে অন্য ল্যাপটপ এ ব্যবহার করবেন । কিন্তু কিভাবে পোর্টেবল হার্ডডিস্ক তৈরি করবেন? আজকের আলোচনায় আমরা জেনে নিবো, কিভাবে ল্যাপটপ এর হার্ডডিস্ক কে পোর্টেবল হার্ডডিস্ক বানানো যায় এই বিষয়ে । চলুন তাহলে নিচের অংশে দেখে নেই ।
ল্যাপটপ এর হার্ডডিস্ককে পোর্টেবল হার্ডডিস্ক বানোর জন্য আপনার যে জিনিসগুলো প্রয়োজন হবে ।
- ল্যাপটপ এর হার্ডডিস্ক
- ক্যাবল
- কেসিং
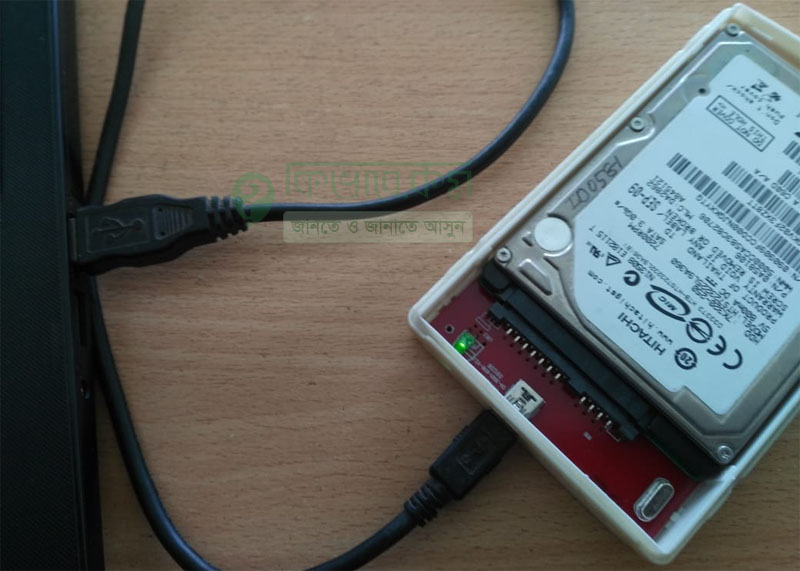
ঠিক নিচের ছবির মতো ।
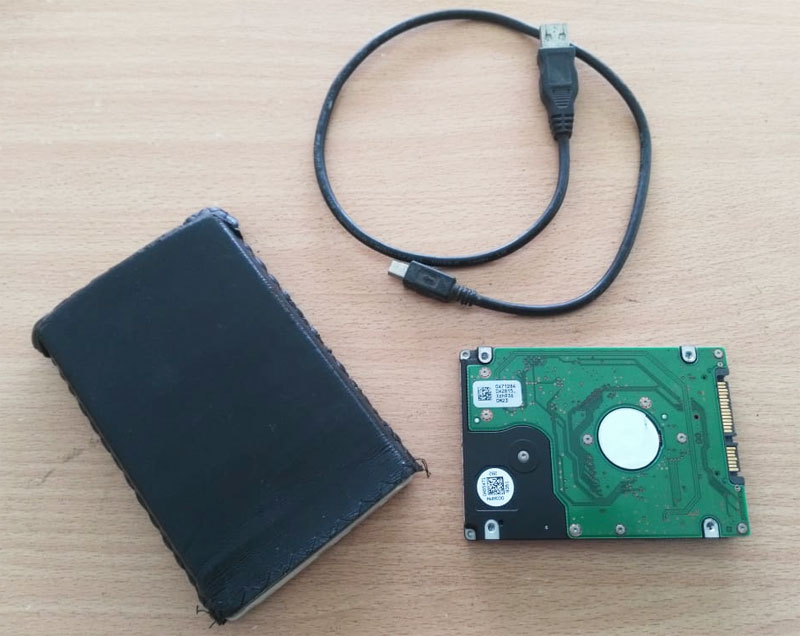
উপরের ছবিতে দেখুন । সেখানে হার্ড ডিস্ক, ক্যাবল এবং কেসিক দেখা যাচ্ছে ।
এবার আপনি কেসিকটি খুলুন । এখন প্রশ্ন হল কেসিকটি কই পাবেন? আপনার এলাকার নিকস্ত কম্পিউটার দোকেন খুঁজ নিতে পারেন । দাম হতে পারে, ৩০০ থেকে ৫০০ টাকার মধ্যে বা বেশি ।
কেসিংটি খোলার পর নিচের ছবির মতো দেখা যাচ্ছে ।
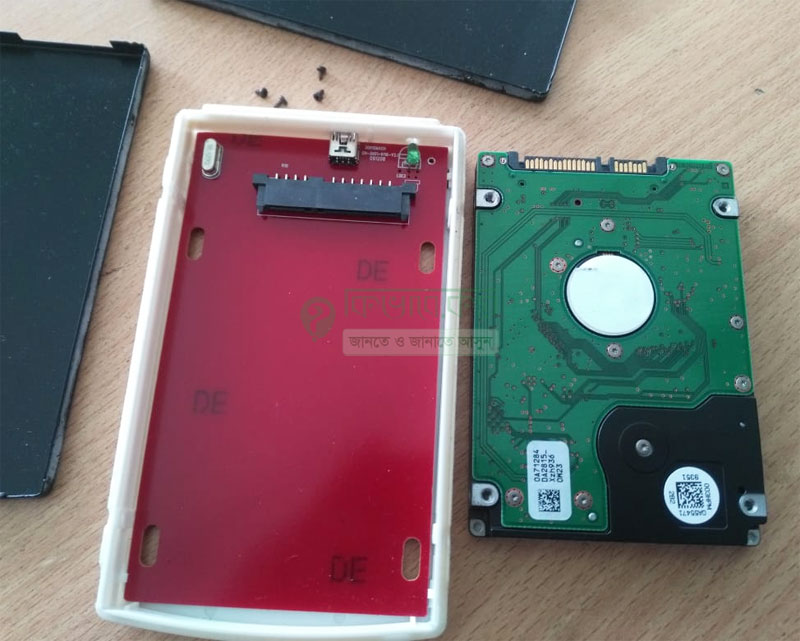
উপরের ছবিতে ভালো ভাবে দেখুন । সেটিতে কেসিক খুলার পর এবং হার্ডডিস্ক উল্ট করে রাখা হয়েছে ।
এরপর হার্ডডিস্কটি কেসিং এর মধ্যে বসে দিন । ঠিক নিচের ছবির মতো ।
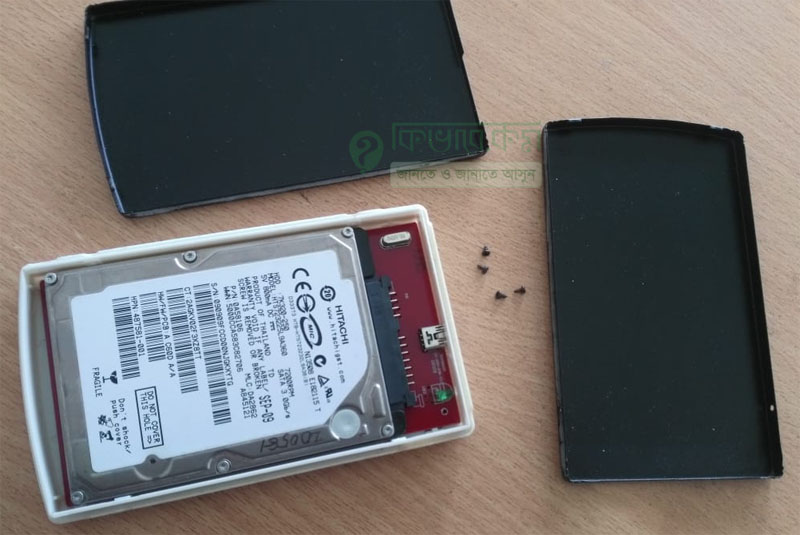
উপরের ছবিতে দেখুন । সেখানে হার্ডডিস্ক বসে দেওয়া দেখা যাচ্ছে । কেসিং এর মধ্যে ল্যাপটপের হার্ড ডিস্ক বসানো পর আপনার পোর্টেবল হার্ডডিস্ক তৈরি । এবার ক্যাবল দিয়ে হার্ডডিস্ক এবং ল্যাপটপের পর্ট এর সাথে কানেক্ট করুন । যা দেখতে নিচের ছবির মতো ।
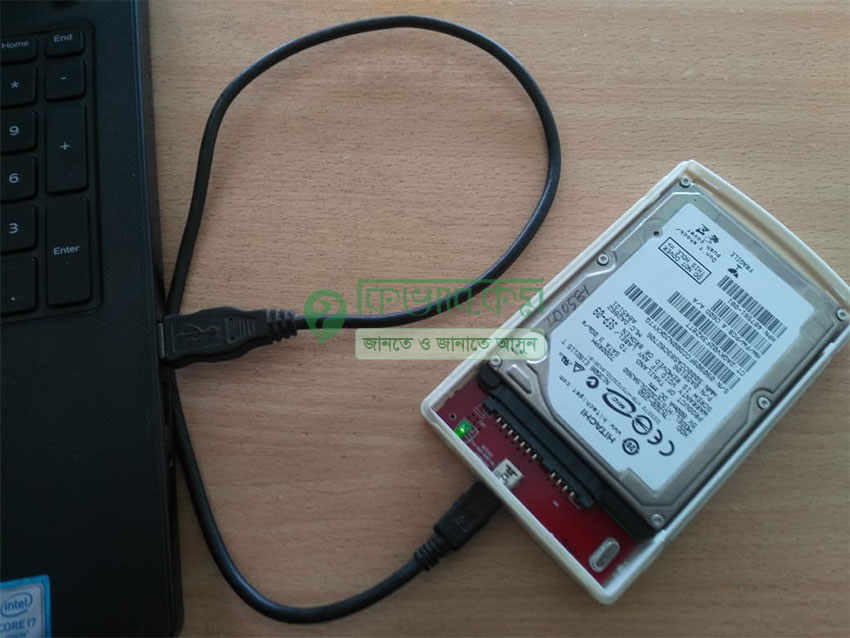
উপরের অংশে দেখুন । সেখানে আমরা পোর্টেবল হার্ড ডিস্ক এবং ক্যাবল এর সাথে ল্যাপটপের সাথে কানেকশন দিয়ে রেখেছি । উপরের ছবিতে দেখলে বুঝতে পারবেন ।
বানাবো পোর্টেবল হার্ডডিস্ক
ল্যাপটপের সাথে কানেক্ট হবার পর নিচের ছবির মতো সবুজ বাতি জলবে ।
উপরের অংশে পোর্টেবল হার্ড ডিস্ক, ক্যাবল দিয়ে কানেকশন করার পর সেটি বাতি জলেছে । অর্থাৎ আপনার পোর্টেবল হার্ডডিস্ক তৈরি ।
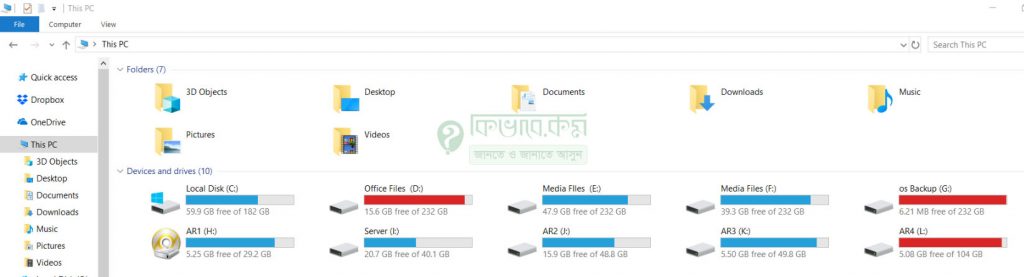
আমার ক্ষেত্রে পোর্টেবল হার্ডডিস্ক লাগানো আগে নিচের ছবির মতো ছিলো ।
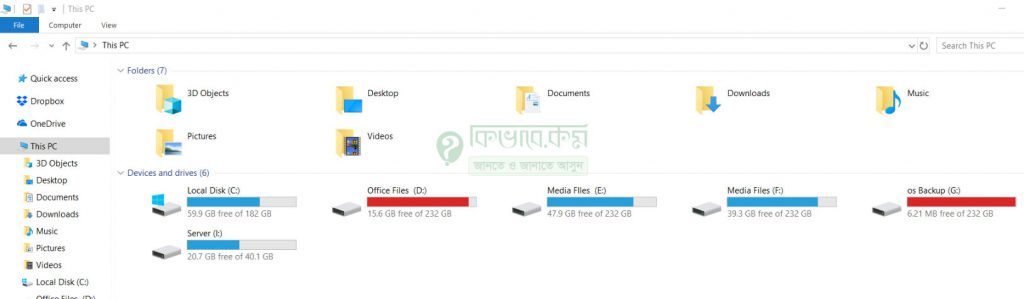
এবার ল্যাপটপ এর সাথে পোর্টেবল হার্ডডিস্ক কানেকশন দেবার পর নিচের ছবির মতো সব হার্ডডিস্কগুলো শো করবে ।
উপরের ছবিতে দেখুন । সেখানে আমার ল্যাপটপ এর হার্ডডিস্ক এবং সদ্য তৈরি করা পোর্টেবল হার্ডডিস্ক এর ড্রাইভগুলো দেখা যাচ্ছে ।
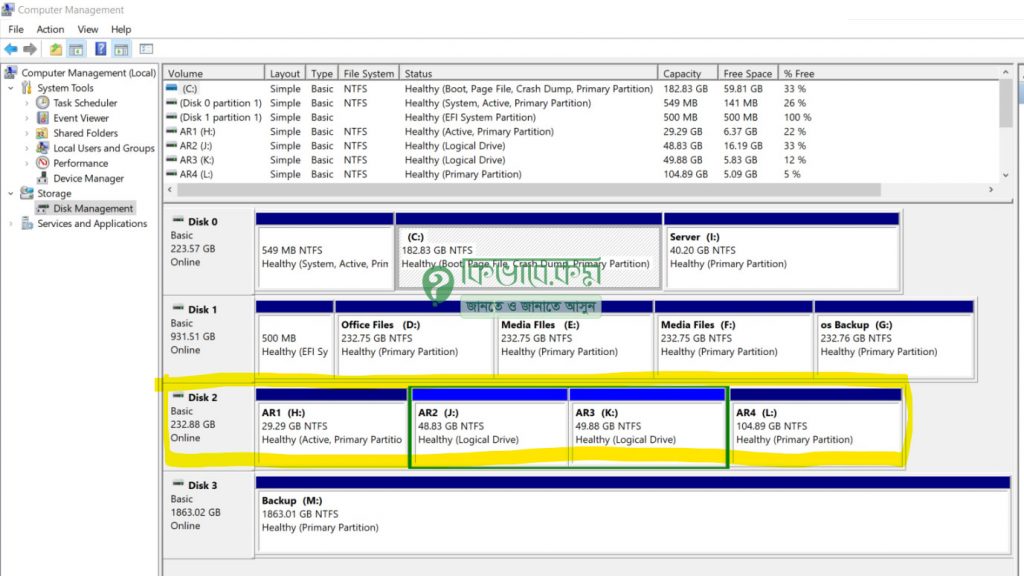
আপনার সদ্য লাগানো হার্ড ডিক্সটি কম্পিউটার এ পেয়েছে কিনা দেখার জন্য desktop এর computer আইকন এর উপর Right Button এ ক্লিক করে Manage এ যান । এবার সেখান থেকে Disk Management নির্বাচন করুন বাম পাশ থেকে । দেখবেন যে আপনার লাগানো হার্ড ডিক্স টি পেয়ে গেছে । আমি আমার ৩২০জিবি পুরোনো একটি হার্ড ড্রাইভ কে পোর্টেবল হার্ড ড্রাইভ করেছি ।