শার্পেন টুলের ব্যবহার – Sharpen Tool – Photoshop 35
শার্পেন টুল ব্লার টুল এর বিপরীতে কাজ করে । ইমেজের ঘোলা কিংবা ঝাপসা অংশ শার্পেন টুলের মাধ্যেমে স্পষ্ট করে প্রকাশ করা যায় । ধরে নিলাম, আপনার কোন একটি ছবির কিছু অংশ ঘোলা কিংবা ছবিটি ঠিক মতো বুঝা যাচ্ছে না । তো কিভাবে ছবির ঘোলা অংশকে ক্লিন করবেন? হাঁ আমরা ইমেজের ঝাপসা বা ঘোলা অংশকে পরিস্কার করতে পারি, ফটোশপে থেকে শার্পেন টুল ব্যবহার করে । নিচের অংশে শার্পেন টুলের ব্যবহার দেখে নেই ।
ইতি পূর্বে আমরা আলোচনা করেছি । ফটোশপ ব্লার টুলের ব্যবহার নিয়ে । আজকের আলোচনায় দেখাবো, ফটোশপে কিভাবে Sharpen Tool এর ব্যবহার করা যায়। কথা না বাড়িয়ে নিচের অংশে স্টেপ বাই স্টেপ দেখে নেই ।
শার্পেন টুল (Sharpen Tool):
আমি আমার ক্ষেত্রে নিচের ছবি ব্যবহার করে আলোচনা করবো ।
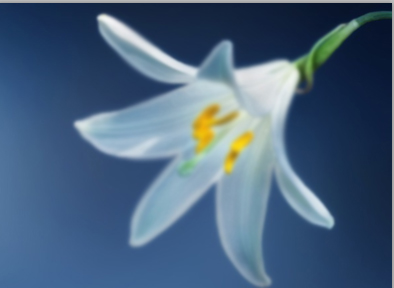
Blur Image & we will make sharp with Photoshop sharpen tool
উপরের ছবিতে লক্ষ করুন । উপরের ছবির বেশ কিছু অংশ ঝাপসা বুঝা যায় । এবার আমরা উপরের ঝাপসা বা ঘোলা অংশে শার্পেন টুল ব্যবহার করে পরিস্কার করে নিবো ।
শার্পেল টুল ব্যবহার করবার জন্য ফটোশপ টুলবক্স থেকে Sharpen Tool নির্বাচন করে নিন ।
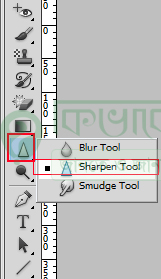
Select Sharpen Tool
ফটোশপ টুলবক্স থেকে উপরের ছবির লাল মার্ক করা আইকনের উপর মাউস পয়েন্টার নিয়ে গিয়ে মাউস থেকে রাইট বাটনে ক্লিক করুন । ক্লিক করার পর সেখানে বেশ কিছু টুল বের হবে। এবার সেখান থেকে Sharpen Tool সিলেক্ট করে নিন ।
শার্পেল টুল সিলেক্ট থাকা অবস্থায় উপরের ছবির ঝাপসা অংশে মাউসের সাহায্যে ঘুসতে থাকুন । দেখবেন, নিচের ছবির মতো উপরের ছবিটি পরিস্কার দেখা যাবে । (শার্পেল টুল সিলেক্ট করার পরেও ছবি ওপেন করে কাজ করতে পারেন )
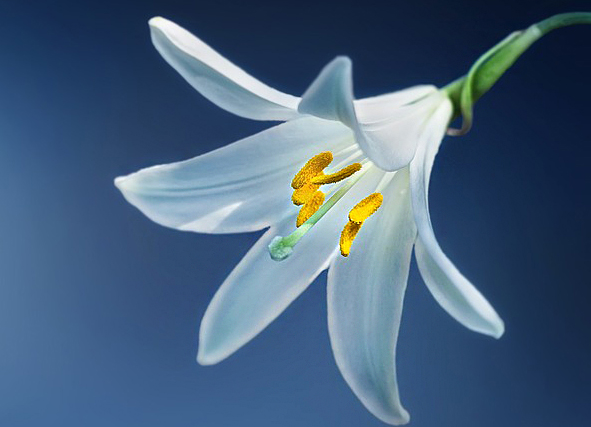
New look of that Image after using Photoshop Sharpen tool
উপরের ছবিতে ভালো ভাবে লক্ষ করুন । উপরের ছবিটি শার্পেন টুল ব্যবহার করে পরিস্কার করা হয়েছে । আপনার ক্ষেত্রে অন্য ছবি ব্যবহার করে শার্পেন করতে পারেন ।
ফটোশপে শার্পেন টুল ব্যবহার করার সময় মাউস পয়েন্টারের সাইজ ছোট বড় করার প্রয়োজন পড়লে । কিবোর্ড থেকে [ এবং ] চাপুন । আবার মাউসের ব্রাশ পরিবর্তন করবার জন্য শার্পেন টুল সিলেক্ট অবস্থায় মাউস থেকে রাইট বাটনে ক্লিক করলে নিচের ছবির মতো ব্রাশ বক্স ওপেন হবে ।
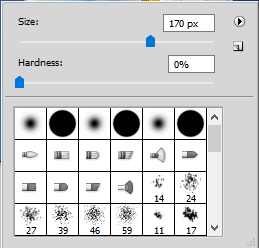
Brush Selection
এবার সেখান থেকে আপনি আপনার পছন্দ মতো ব্রাশ নির্বাচন করে ব্যবহার করতে পারবেন ।