Microsoft Excel এ পেজ ব্রেক করার নিয়ম
অনেক সময় Excel ওয়ার্কশীটে কাজ করতে গিয়ে এমন হয় যে একাধিক ডকুমেন্ট বা টেবিল তৈরির জন্য আলাদা ভাবে ওয়ার্কশীট নেয়ার প্রয়োজন হয়। এ ক্ষেত্রে আপনি চাইলে একটি ওয়ার্কশীটেই একাধিক ডকুমেন্ট বা টেবিল তৈরি করে আলাদা পেজ হিসেবে ব্যবহার করতে পারবেন। তাই আজ আমরা আলোচনা করবো Page Breaks অপশনটি ব্যবহার করে কিভাবে একটি ওয়ার্কশীটেই একাধিক ডকুমেন্ট বা টেবিল তৈরি করা যায়। আসুন তাহলে জেনে নেই Microsoft Excel এ পেজ ব্রেক করার নিয়ম গুলো কি কি ?
Page Break অপশনটির ব্যবহার দেখাতে এবং আলোচনার সুবিধার্থে নিচে একটি টেবিল ব্যবহার করা হলঃ
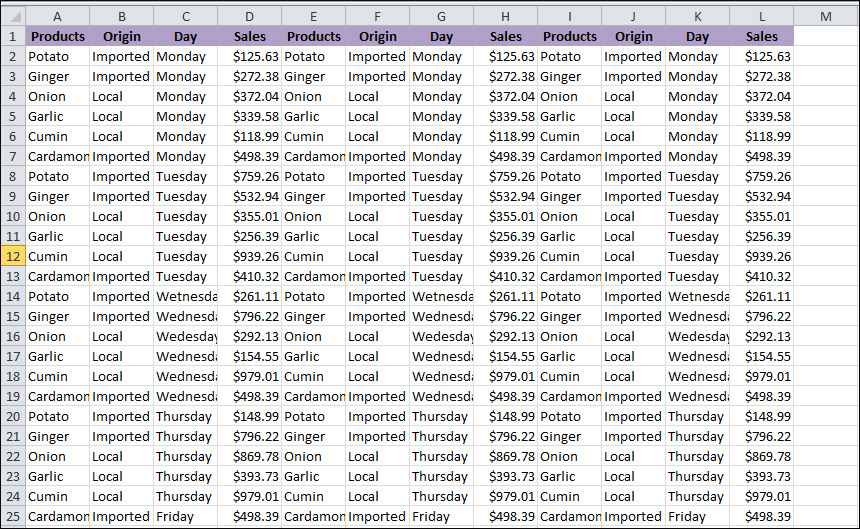
উপরে ছবিতে লক্ষ্য করুন, একটি টেবিল দেখা যাচ্ছে এবং ওয়ার্কশীটে এই টেবিলের পরিধি ‘L’ কলামের ’43’ নাম্বার রো পর্যন্ত।
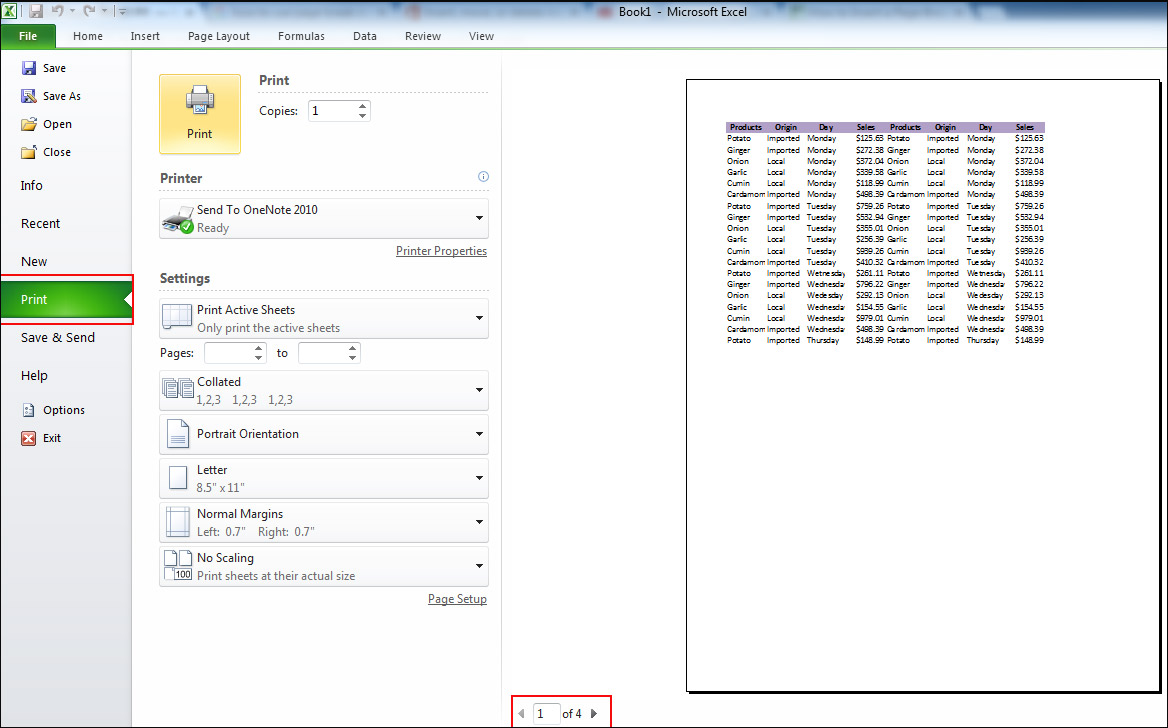
এই টেবিলটিকে যদি আমরা Page Setup ডায়ালগ বক্স থেকে দেখি তাহলে আমরা সম্পূর্ণ পেজটির print Preview দেখতে পাবো। চলুন টেবিলটিতে পেজ ব্রেক করার পূর্বে পেজের Print Preview দেখে নেই। Page Setup ডায়ালগ বক্স থেকে পেজের Preview দেখার জন্য Page Layout ট্যাবে Page Setup গ্রুপের ডান দিকে নিচের তীর চিহ্নিত অংশে ক্লিক করুন, সেখানে একটি ডায়ালগ বক্স আসবে।
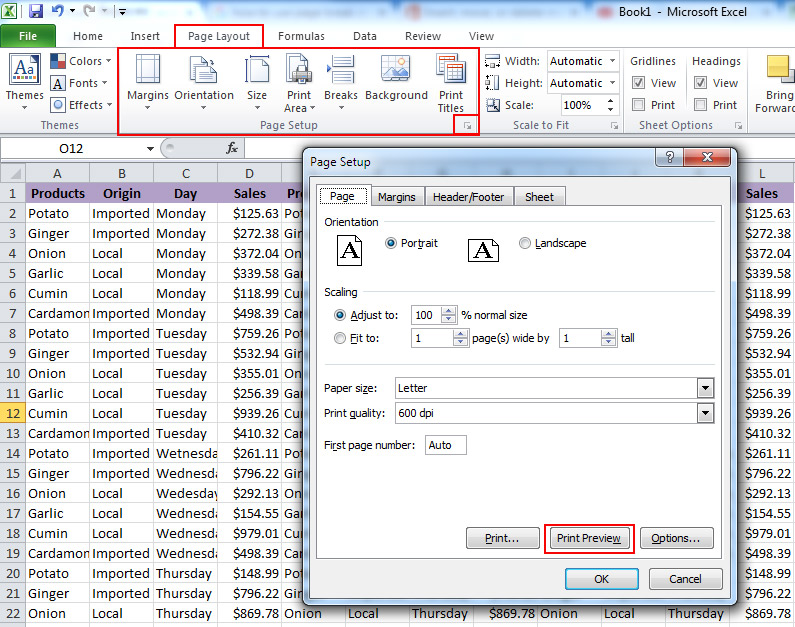
Show the Print Preview in the Page Setup Dialog Box
উপরের ছবিতে লক্ষ্য করুন, Print Preview দেখার জন্য লালদাগ চিহ্নিত অংশ গুলো ব্যবহার করুন।Print Preview অপশনে ক্লিক করার পর স্ক্রিনে সম্পূর্ণ ভাবে পেজটির প্রিন্ট প্রিভিউ দেখাবে।
নিচের ছবিতে দেখুন:
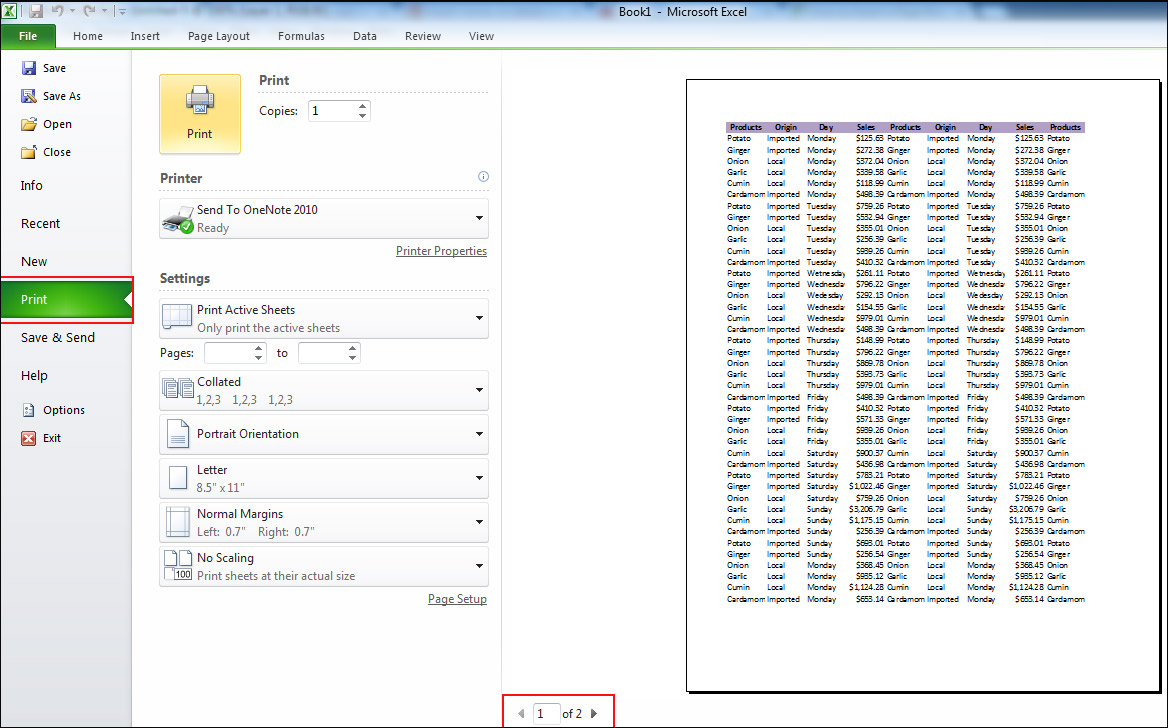
Show the Print Preview After Clicking Page Setup Dialog Box
উপরের ছবিতে লক্ষ্য করুন, এখানে আমরা টেবিলটি যে ভাবে দেখছি প্রিন্ট করলে ঠিক সেই ভাবেই আসবে।
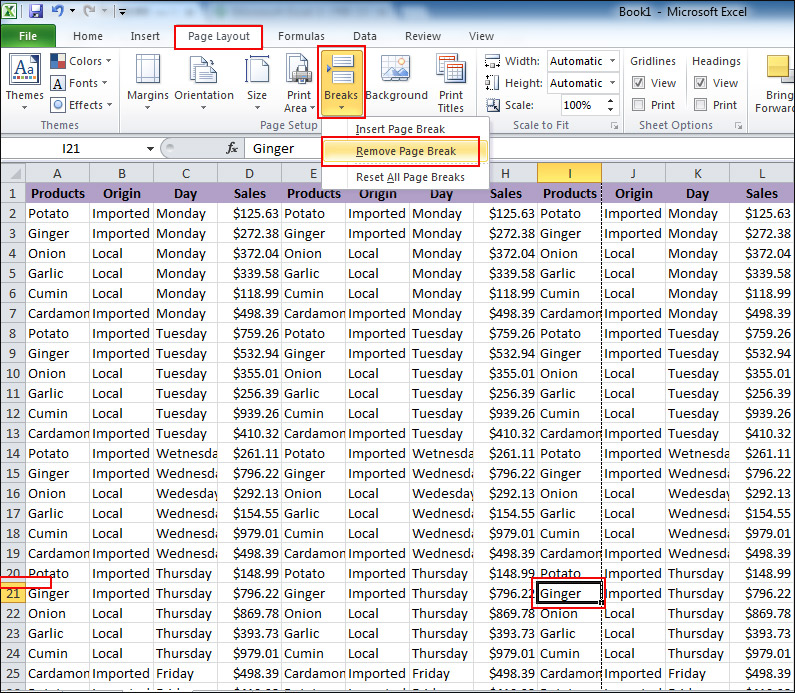
এখন আমরা পেজ ব্রেক অপশন ব্যবহার করে টেবিলটি মাঝ বরাবর দুটি আলাদা অংশে বিভক্ত করবো। যাতে একটি টেবিল দুটি আলাদা অংশে বিভক্ত হয়ে দুটি পেজ হিসেবে কাজ করে। যেহেতু পেজটি Print Preview অবস্থায় রয়েছে সেহেতু Page Layout ট্যাবে ক্লিক করে পুনরায় ওয়ার্কশীটে ফিরে যাবো। তারপর টেবিলের যে অংশ থেকে আমরা টেবিলটি আলাদা করবেন সে অংশের সেলটিকে সিলেক্ট করুন। তারপর রিবনের Page Layout ট্যাব থেকে Page Setup গ্রুপের Break অপশনে ক্লিক করুন। তাহলে একটি বর্ডার দ্বারা টেবিলটি বিভক্ত হয়ে যাবে।
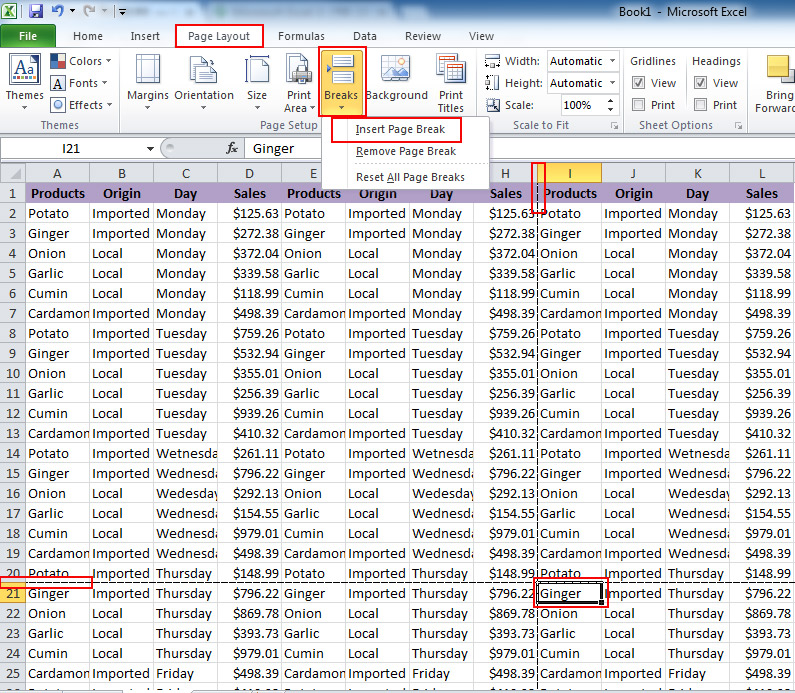
Use of Page Break in Excel
উপরের ছবিতে লক্ষ্য করুন, Page Break অপশন ব্যবহার করার পর একটি বর্ডার দ্বারা টেবিলটি বিভক্ত হয়ে গেছে যা লালদাগ দ্বারা চিহ্নিত করা হয়েছে। এখন আমরা পুনরায় Page Setup ডায়ালগ বক্স থেকে Print Preview করে দেখবো যে টেবিলটি প্রিন্ট করলে সেটি কি অবস্থায় প্রিন্ট হবে।
The View of Table after Applying Page Break
উপরের ছবিতে লক্ষ্য করুন, টেবিলের যে অংশে থেকে পেজ ব্রেক করা হয়েছে Printing করার জন্য শুধু সেই অংশ টুকু Print Preview তে চলে এসেছে। এবং বাকি অংশ টুকু আলাদা একটি পেজ ধারণ করেছে, যেটি উপরের ছবিতে নিচের লালদাগ অংশে চেক করলে দেখতে পাবেন।
এখন যদি আপনি Page Break উঠিয়ে ফেলতে চান, তাহলে পুনরায় রিবনের Page Layout ট্যাব থেকে Page Setup গ্রুপের Break অপশনে ক্লিক করুন। তারপর সেখানে Remove Page Break অপশনে ক্লিক করুন। তাহলে পেজ ব্রেক উঠে গিয়ে পুনরায় একটি পেজে পরিণত হবে।
After Remove the Page Break in Excel
উপরের ছবিতে লালদাগ চিহ্নিত অংশে লক্ষ্য করুন, Remove Page Break অপশন ব্যবহার করার পর পেজ ব্রেক উঠে গিয়ে পুনরায় একটি পেজে পরিণত হয়ে গেছে। আপনি Print Preview চেক করে বিষয়টি নিশ্চিত হতে পারেন।
উপরের নির্দেশিত নিয়ম অনুযায়ী আপনি পেজ ব্রেক অপশন ব্যবহার করে একটি ওয়ার্কশীটের ডকুমেন্টকে একাধিক পেজে বিভক্ত করতে পারবেন। এবং প্রিন্টিং করার ক্ষেত্রেও একই ভাবে সবগুলো অংশ আলাদা ভাবে পেজ ধারণ করবে, তো এই ছিল আমাদের আজকের আলোচনা। আমরা চেষ্টা করেছি Microsoft Excel এ পেজ ব্রেক করার নিয়ম সম্পর্কে আপনাদের ধারণা দেবার। আশা করি আপনাদের ভালো লেগেছে, আরও নতুন কোন বিষয় জানতে আমাদের সাথেই থাকুন। ধন্যবাদ …
পরবর্তী টিউটোরিয়ালঃ কিভাবে Microsoft Excel এ Header ও Footer ব্যবহার করতে হয়
আগের টিউটোরিয়ালঃ Microsoft Excel এ বিভিন্ন Themes এর ব্যবহার