Microsoft Excel এ Data Validation কিভাবে করবো
আজকে আমরা আলোচনা করবো কিভাবে Excel এ Data Validation করা যায়। যেমন ধরুন, আপনি এক্সেল ওয়ার্কশিটে একটি ডাটা লিস্ট তৈরি করেছেন। এখন আপনি চাচ্ছেন আপনার এক্সেল ওয়ার্কশিটে B2 থেকে B15 পর্যন্ত সেলগুলোতে শুধু টেক্সট লিখতে দিবেন কোন নাম্বার লিখতে দিবেন না। তো কিভাবে এক্সেলে আমরা শুধু টেক্সট লিখতে দিবো অন্য কিছু না। আসুন আমরা নিচের অংশ থেকে জেনে নেই।
এক্সেল ডাটা ভ্য়ালিডেশন
এই কাজটি করার জন্য আমরা এক্সেল থেকে Data Validation অপশন ব্যবহার করবো। Data Validation ব্যবহার করবার জন্য প্রথমে এক্সেল ওয়ার্কশিট থেকে যে পর্যন্ত ডাটা লিস্ট তৈরি করতে চাচ্ছেন, সে পর্যন্ত লিস্টটি সিলেক্ট করুন। নিচের ছবিতে দেখুন ।

excel cell selected
আমার ক্ষেত্রে B2 থেকে B15 পর্যন্ত সেল সিলেক্ট করেছি। সেল সিলেক্ট করার পর এক্সেল এর রিবোন থেকে Data তে ক্লিক করে Data Validation এ যান। ঠিক নিচের ছবিটির মতো।
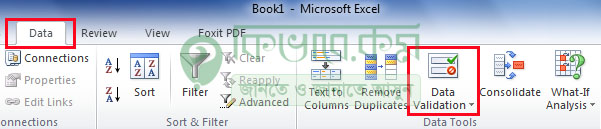
Data Validation
এক্সেল Data Validation অপশনে ক্লিক করলে নিচের ছবিটির মতো ছবি দেখা যাবে।
click to custom
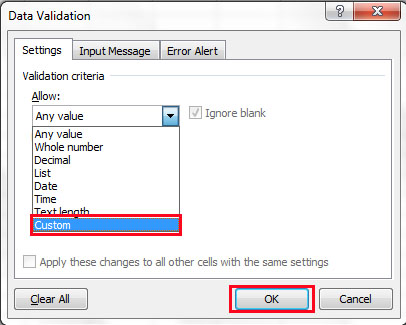
এবার Setting থেকে Allow এ ক্লিক করলে নিচের দিকে বেশ কিছু অপশন দেখা যাবে। এবার সেখান থেকে লাল মার্ক করা Custom লেখা অপশনে ক্লিক করলে নিচের ছবিটির মতো Formula লিখবার একটি ঘর চলে আসবে। নিচের দিকে দেখুন।
Formula
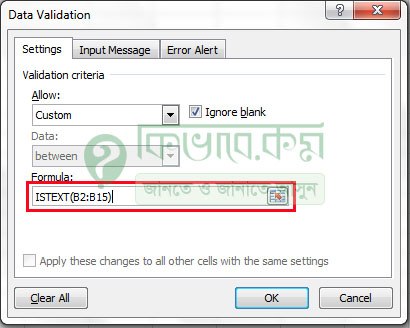
এবার উপরের লাল মার্ক করা Formula ঘরে টাইপ করুন =ISTEXT(B2:B15) এবং নিচের OK লেখা বাটনে ক্লিক করুন। এবার B2 থেকে B15 ঘরগুলোতে নাম্বার লিখে চেক করে দেখুন। নাম্বার লেখা যায় কি না।

error message from excel
আমার ক্ষেত্রে ঐ ঘরে নাম্বার লিখলে উপরের মতো Error Message দিচ্ছে ।
একই ভাবে আপনি =ISTEXT এর পরিবর্তে =ISNUMBER() ফাংশন ও ব্যবহার করতে পারেন যা ঐ সেল গুলোতে শুধু নাম্বার যোগ করতে দেবে ।
পরবর্তী টিউটোরিয়ালঃ MS Excel এ বর্ণ বা অক্ষর এর ক্রমিক লিস্ট তৈরি করবো কিভাবে
আগের টিউটোরিয়ালঃ মাইক্রোসফট এক্সেলে তারিখ থেকে দিন কিভাবে বের করবো